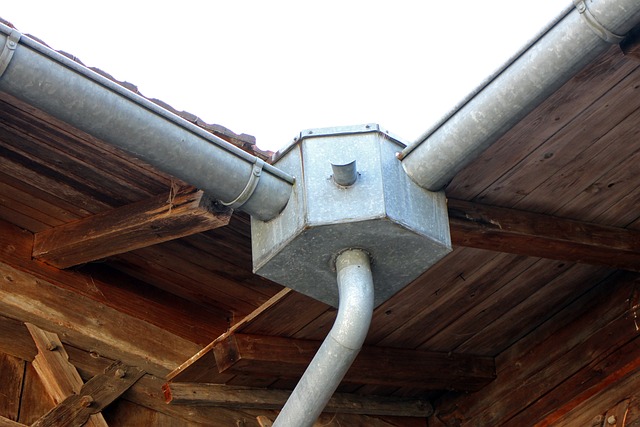
Are you a DIY enthusiast looking to tackle a new home improvement project? Well, we have just the thing for you! In today’s blog post, we’re going to share some quick and easy gutter installation tips that will help you protect your home from water damage and give it a polished, finished look. Installing gutters may seem like a daunting task, but with the right guidance and a little bit of elbow grease, you can have them up and running in no time. Whether you’re a seasoned DIYer or just starting out, these tips will provide you with the confidence and knowledge to take on this project like a pro. So grab your tools and let’s get started on transforming your home’s exterior!
Assess Your Gutter Needs
Before embarking on a DIY gutter installation project, it’s crucial to assess your gutter needs accurately. Start by determining the appropriate materials and sizing for your home. Consider factors such as climate, rainfall intensity, and the size of your roof. Different materials, such as aluminum, copper, or vinyl, offer distinct advantages and price ranges.
Additionally, decide between sectional or seamless gutters based on your preferences and budget. For instance, you can find a vast choice in rain gutters made from various materials such as aluminum, copper, steel, and vinyl. Each material offers its own set of advantages and price points.
Taking the time to carefully assess your gutter needs will ensure that you make informed decisions, leading to a successful and long-lasting gutter system that effectively protects your home from water damage.
Gather the Essentials for Gutter Installation
Before diving into your DIY gutter installation project, it’s crucial to gather all the necessary tools and materials. Having the right equipment on hand will streamline the installation process and ensure a professional-looking outcome. Essential tools include a measuring tape, level, drill, screwdriver, hacksaw, and ladder.
Additionally, you’ll need gutter sections, end caps, downspouts, brackets, screws, and sealant. Consider investing in gutter guards or leaf screens to minimize clogs and maintenance in the future. By properly equipping yourself with the required tools and materials, you’ll be well-prepared to tackle your gutter installation project with confidence and efficiency.
Important Precautions to Consider
When undertaking a DIY gutter installation, prioritizing safety is paramount. Before starting the project, familiarize yourself with essential safety precautions. Begin by wearing appropriate personal protective equipment (PPE), such as gloves and safety goggles, to protect against cuts and debris. Ensure your ladder is stable and positioned on level ground before climbing. Use a harness or rope for added stability and avoid overreaching.
Be cautious of electrical wires and always turn off power in the vicinity. Never work on the roof during adverse weather conditions, such as strong winds or rain. By taking these precautions, you’ll create a safer working environment and minimize the risk of accidents or injuries.
Map Out Your Gutter System
Before jumping into the installation process, it’s crucial to take accurate measurements and plan the layout of your gutter system. Begin by measuring the length of your roofline to determine the required gutter sections. Consider the slope of the roof and calculate the necessary downspouts for efficient water drainage.
Take note of any obstacles, such as windows or doors, that may affect the placement of your gutters. Use a chalk line or string to create a visual guide for alignment. By meticulously measuring and planning your gutter system, you’ll ensure a precise installation that maximizes water flow and minimizes potential issues down the line.
Prepare the Area
Before installing your new gutter system, it’s crucial to thoroughly prepare the area by clearing and cleaning the gutter path. Start by removing any debris, leaves, or branches that may obstruct the flow of water. Use a sturdy ladder and gloves to carefully scoop out accumulated dirt and debris from the existing gutters, ensuring they are completely clear. Inspect the fascia and soffit for signs of damage and repair or replace as needed.
Additionally, clean the roof surface to prevent debris from falling into the gutters in the future. By taking the time to properly prepare the area, you’ll ensure optimal performance and longevity of your new gutter system.
Putting Up Your Gutter System
Once you have completed the necessary preparations, it’s time to start putting up your gutter system. Begin by attaching the gutter brackets to the fascia at regular intervals, ensuring they are level and properly aligned. Next, connect the gutter sections, securely fastening them with screws or rivets. Install end caps to seal the ends and add downspouts where needed for water drainage.
Use a level to ensure proper slope and alignment throughout the installation. Finally, test the system by pouring water into the gutters and checking for any leaks or issues. By following this step-by-step guide, you’ll successfully install your gutter system and safeguard your home from water damage.
By following these quick and easy gutter installation tips, DIY enthusiasts can successfully complete their gutter projects with confidence. From assessing your needs and gathering the right tools to ensuring safety and meticulous planning, each step plays a crucial role in achieving a functional and durable gutter system. With proper installation and maintenance, you can enjoy the benefits of effective water management, protecting your home from potential damage while enhancing its overall aesthetics. Embrace the satisfaction of a job well done as you admire your newly installed gutter system.


